UPB setup/import plugin
 The UPB setup/import plugin can perform the initial configuration of the
HomeVision Custom Lighting System for use with the UPB system.
At a later stage, the tool can be used to keep the HomeVision schedule up to date with the changes made to the UPB setup. This is done by importing the files that have been exported by the UPStart tool. During an import action, the tool will create and/or update the HomeVision light objects corresponding with the UPB switches.
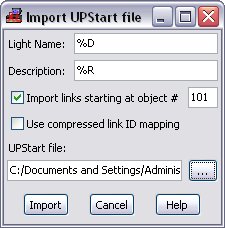
It is possible to also import the UPB links into HomeVision light objects. If this option is selected an appropriate starting object number must be specified.
The user can specify how to map the UPB Device name and Room name properties to the HomeVision light Name and Description fields. By default the Name field gets set to the Device name and the Room name is placed in the Description field.
Specifying the Name and Description field is done through format strings. These format strings recognize the following format specifiers:
| %% | Insert a single percent character. |
| %D | Insert the Device name property from the UPStart export file. |
| %R | Insert the Room name property from the UPStart export file. |
| %N | Insert the Switch number. |
Example: To set the name of the HomeVision light object to the UPB switch Device name followed by the Room name in parentheses you would specify the Light Name format string as: "%D (%R)"
Initial setup of a UPB lighting system
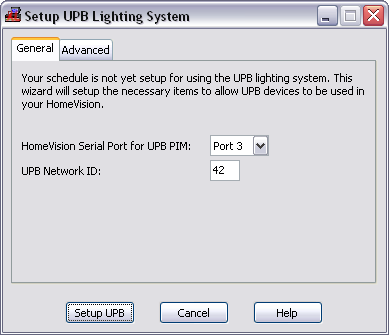
If no HomeVision custom lighting system has been setup at all yet (the Custom Lighting System Control Mode is set to "None" on the HomeVisionXL Custom Lighting Configuration screen), the plugin will offer to set it up for you. All you really have to do is specify the UPB network ID and which serial port to use.
When you click the Setup UPB button the plugin will configure the serial port and create new objects for the variables and macro to be used by the UPB code. The appropriate code is generated for the serial input action and the UPB control macro. Additionally also some code will be added to the Power Failure Recovery action for forcing the UPB PIM back into message mode after a power failure.
Advanced controls
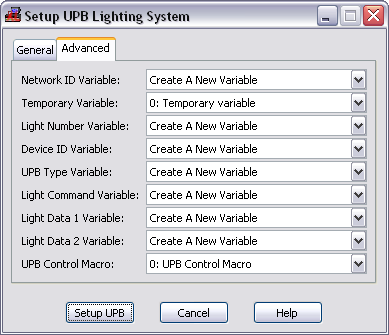
If you have already reserved some variables or a macro that you want the UPB
system to use instead of creating new ones, you can specify this on the
Advanced tab. To use existing variables or macros, select the object you
want the UPB setup to use. For objects that have not yet been reserved, you
can tell the tool to create new objects by selecting Create A New
Variable or Create A New Macro.
Warning: When selecting an existing macro, any actions specified for
that macro will be overwritten by the UPB code.

For Temporary Variable you can select a variable that is also used
elsewhere in your schedule as a temporary variable. Just make sure it is not
important that the value of the variable is preserved from one event loop
to the next. If unsure it is better to let the plugin Create A New
Variable.